Tight pegs If you find your pegs becoming stiff with a jerky movement so that you end up tuning above or below the note but never quite seem to be able to find the right spot it is time for some lubrication (and I don't mean a glass of red wine!) Let the string down gently and remove the peg. Take a small piece of hard dry soap (the sort of piece you would normally throw away is ideal) and put a small smear on the two places where it passes through the peg box, don't over do it ! Then turn it a few times in it's hole before replacing the string, if you have been frugal with the soap it will have corrected the problem, if you over did the soaping, well ... move on to the next section.
Slipping pegs Remove the peg as described above and apply some ordinary chalk (blackboard chalk) to the parts of the peg that seat in the peg box, they usually show up as shiny bands around the peg. You will need to be more generous with chalk than soap, better than chalk is artists pastel, it is not quite so harsh and has the added advantage of being able to find a good colour match. Sometimes pegs will require both treatments.
Changing violin strings
If you are replacing the whole set, just change one string at a time this is much
better for the violin as it avoids drastic alterations in tension. If you have tailpiece adjusters fitted be careful how you fit the string through the adjuster, it is easy to damage the string or the winding, there is not much room to spare. Please see our
strings information page for more comprehensive fitting instructions together with lots of information on many of the different types available.
The violin bridge
The bridge is the most important fitting on the exterior of the
violin and on its shape, height, position and angle depends to a great extent the
sound of your violin. It is not fixed in position but is only held in place by the tension of the strings passing over its top edge. A violin maker or restorer aims to make a bridge which will transmit the most vibration energy from the strings to the body. This vibration is transmitted through the bridge and sound post to the body of the violin (mainly the top and back), which allows the sound to effectively radiate into the air. The body of the violin acts as a "sound box" to amplify the sound of the vibrating strings and make them audible. (In reality, there is no "amplification": the vibrating top and back plates of the body simply increase the loudness of the sound since they have a larger surface area.
When you
purchase your violin the bridge should be in the correct position however if you need to place it, align the feet of the bridge between the two small nicks on the inside of the two "F" holes,
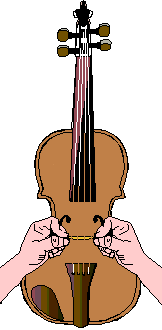
Important! Every time you tune using the pegs the top of the bridge moves a small amount towards the pegs, it is a small amount and so not usually noticed, however if this movement is left unchecked it will eventually lead to a warped or broken bridge or worst of all the bridge will suddenly collapse forward with considerable force causing possible damage to the violin.

